How to Spatchcock a Turkey
Want to know how to spatchcock a turkey? I’ve got you covered with this VISUAL tutorial (that includes a video!) to show you exactly how to spatchcock a whole turkey! While this may seem like an intimidating task, you’re about to see just how easy it is. A butterfly turkey is an excellent choice for any holiday because it cooks a lot faster AND you can use the back for turkey stock.
Need ideas for how to prepare your spatchcock turkey? Try it with this Turkey Dry Rub and Compound Butter!
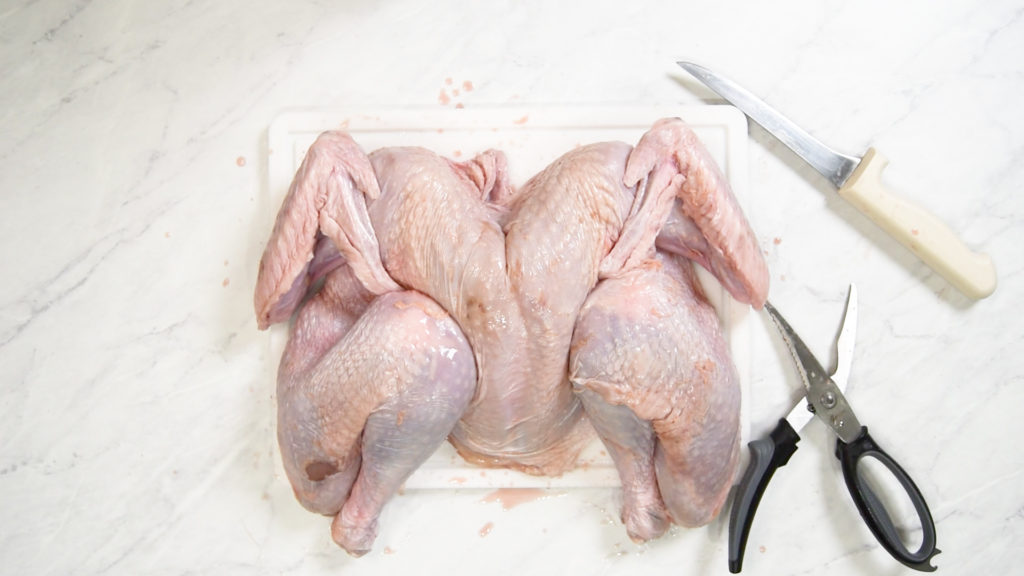
Why Spatchcock a Turkey?
Dealing with a whole turkey can seem like a daunting task, so spatchcocking, or butterflying it, makes this large bird a lot more manageable for any home cook.
Spatchcock turkey can taste better, too, because you can season it better. You can lift a lot more skin to get the seasoning directly onto the flesh, AND you can season the inside a lot better since it’s all exposed by the spatchcocking process.
As if this wasn’t enough reason to spatchcock your next turkey, here’s another one—a spatchcock turkey cooks much faster, too, since it’s now just laying there completely flat. And because it’s flat, heat moves through it a lot more efficiently and evenly. This, amigos, also helps us get deliciously juicy turkey meat.
That said, this process can also seem intimidating, but it’s definitely a skill worth knowing. Besides, trust me when I say that this is way easier than you think!
I’ll start by giving you some turkey 101 details so you can know how to buy and overall handle the bird, then we’ll go into my step by step instructions on how to spatchcock a turkey below. You’ve got this!
Don’t forget to watch the video!!
Beijinhos! xx
What size turkey should I spatchcock?
Any size, really! Just get the right size bird for your family and the amount of people you’re serving.
I used a 10 lb. turkey because I’m just serving two people.
That said, keep in mind that when you butterfly a turkey, it spreads out, so make sure it’ll fit your baking sheet and oven. You can also grill or smoke it, so ensure it fits on there, too.
What you’ll need to spatchcock:
Brazilian Kitchen Abroad is a participant in the Amazon Services LLC Associates Program, an affiliate advertising program designed to provide a means for us to earn fees by linking to Amazon.com and affiliated sites.
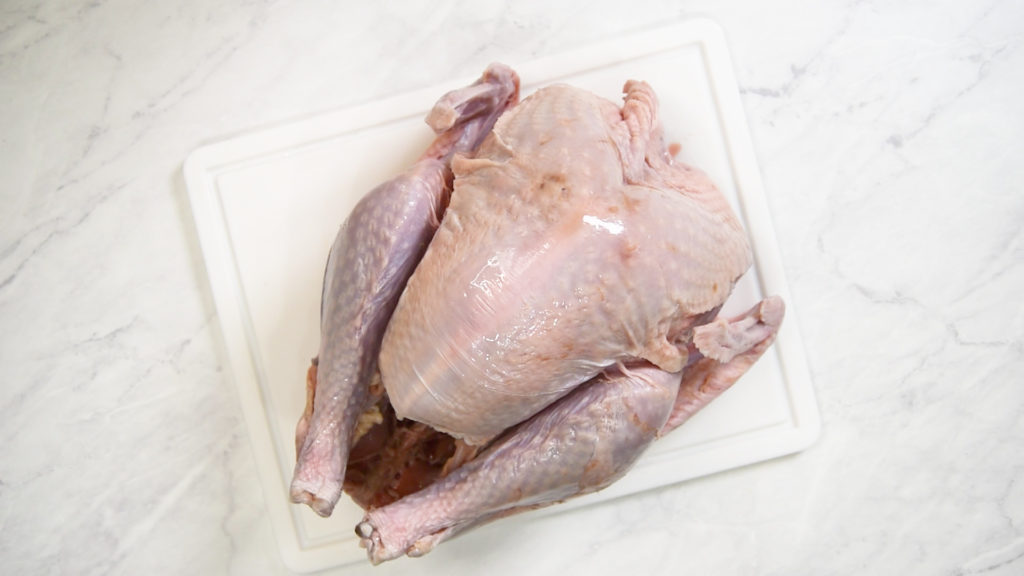
- A whole turkey
- A cutting board
- A boning knife
- A good pair of kitchen shears
- Towels/paper towels and cleaner for wiping your working area
Some pro tips for keeping safe because wet turkey is slippery:
- Pat the turkey completely dry before beginning the process.
- Make sure your shears are sharp. This will make it easier to cut the turkey, though them being sharp makes them a little more dangerous, too. So, be careful!
- Keep your area clean to avoid food safety issues.
How to Spatchcock a Turkey
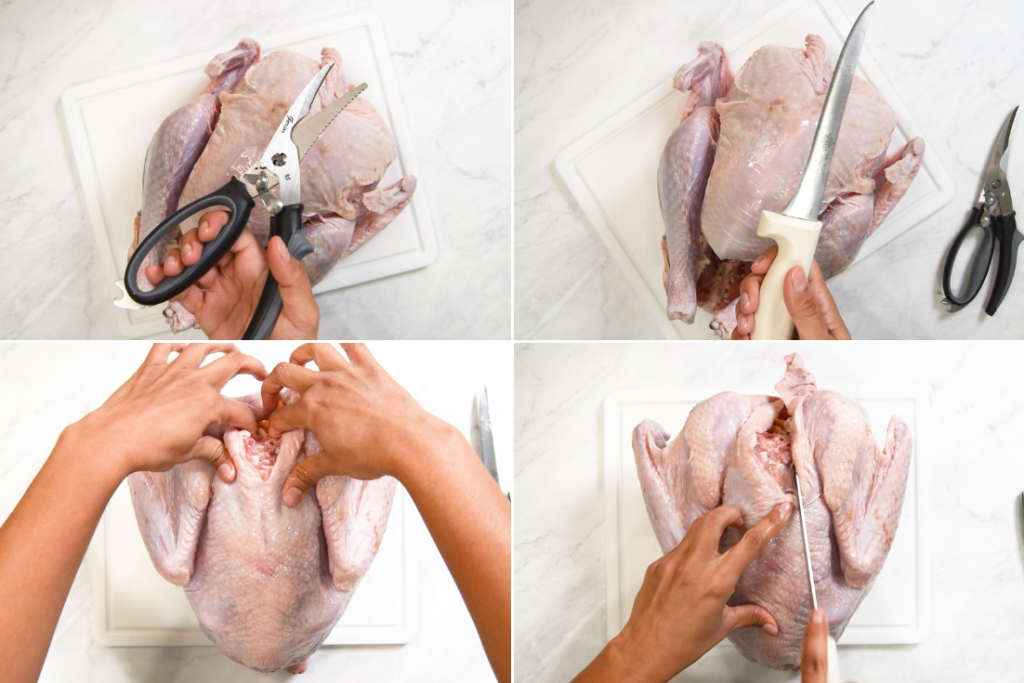
Place the whole bird onto your cutting board, spine-side up. (I like using this type of plastic board because it prevents some slippage, and it’s also easier to clean.)
If your turkey came with a neck inside, woohoo! You can remove it and toss it in a food storage bag and save it for stock.
Next, “feel” for the spine using your fingers.
Use the paring knife to score the skin on both sides of the spine. Basically, we do this to delineate the area where you’ll be cutting.
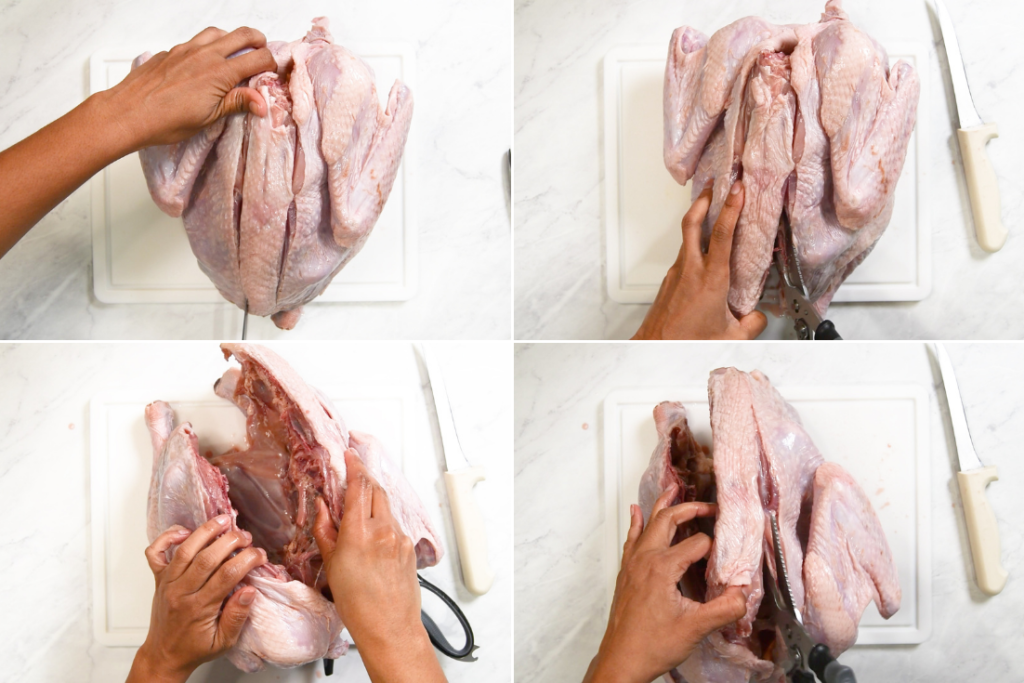
Next, pick up the kitchen sheers. Start cutting, following your marks from the boning knife down the side of the backbone.
The hip area might be the most challenging part, so wiggle and press. Good sheers will cut right through it.
Where should I start? There’s no right or wrong side to start with, but I tend to start from the top, near the neck. When I get to the hip and feel some resistance, especially on larger birds, I flip to the bottom and go up until I reach the hip again and cut through it.
Turn the turkey to do this on both sides, then remove the spine completely.
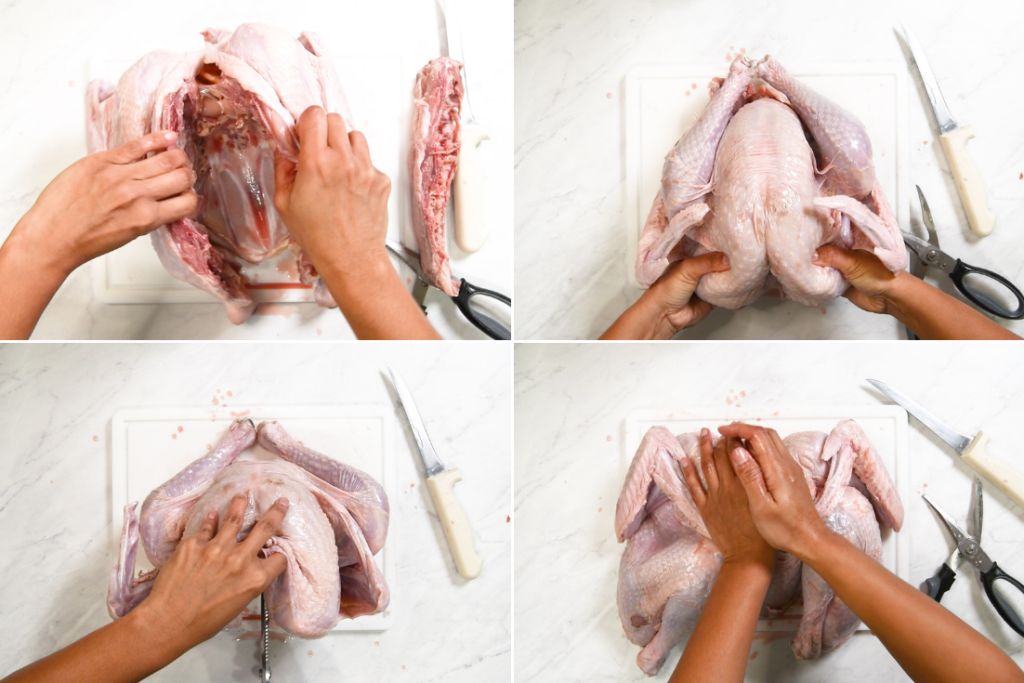
When the spine is removed, set it aside and save it for stock! Just toss it in the food storage bag along with the neck, and freeze for later or refrigerate to use in a couple of days.
Next, use your hands to pull the turkey apart, as shown in the images above, and in the video.
Flip the turkey breast side up, then cut the collar bone. If you are able, remove it completely.
Then, push it down with the heels of your hands and press it hard to crack the chest bone so the bird can lay flat.
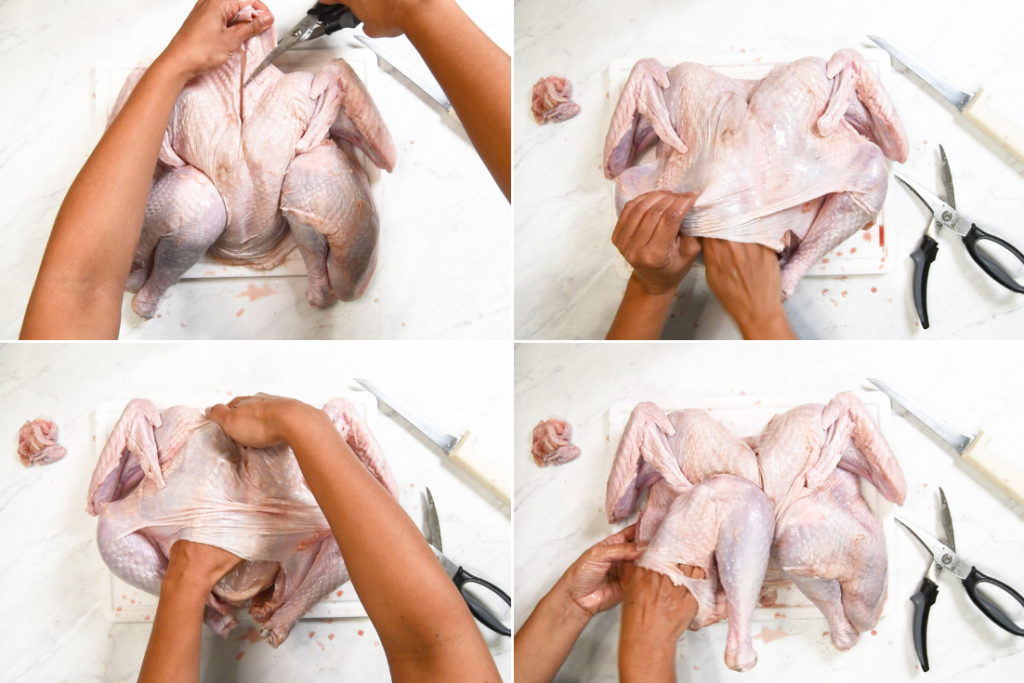
Next, cut off excess fat on the neck, as well as around the thighs.
Then get the spatchcock turkey ready for maximum seasoning by gently loosening the skin all over the chest and thigh areas.
Now the turkey is ready to be seasoned and cooked.
Make it Delicious! Here are some turkey recipes you’ll love:
Frequently Asked Questions
There are a number of reasons why spatchcocking a turkey is a good idea, and it includes shorter cook time, better flavor and more juiciness. I discuss more in detail above. So read up and decide if spatchcocking is for you!
Spatchcocking is not a requirement for brining, but there are a number of reasons to spatchcock listed in this article.
FOR MORE BRAZILIAN FOOD INSPO, BE SURE TO FOLLOW ME ON
How to Spatchcock a Turkey
Ingredients
- 1 whole turkey thawed, if frozen
Instructions
- Place the whole bird onto a cutting board, spine-side up. If your turkey came with a neck inside, remove it and either discard it or save it for stock.
- Next, "feel" for the spine using your fingers.
- Use the paring knife to score the skin on both sides of the spine to delineate the area where you'll be cutting.
- Next, using sharp kitchen sheers, start cutting, following your marks from the boning knife down the side of the backbone.
- Repeat on the other side and remove the spine.
- When the spine is removed, set it aside and save it for stock along with the neck or discard.
- Next, use your hands to pull the turkey apart, as shown in the images above, and in the video.
- Flip the bird chest side up, then cut the collar bone. If you are able, remove it completely.
- Then, push it down with the heels of your hands and press it hard to crack the chest bone so the bird can lay flat.
- Next, cut off excess fat on the neck, as well as around the thighs.
- Then get the spatchcock turkey ready for maximum seasoning by gently loosening the skin all over the chest and thigh areas.
- Now the turkey is ready to be seasoned and cooked.



The thought of making a spatchcock turkey has always overwhelmed me! Your visual breakdown was a great way to break the barrier though, it was so much easier to follow this way!
This step by step guide was so helpful. I was nervous to try this but it really helped to have the video. Thanks for the help!!
I always hated thanksgivings, because I could never cook a turkey quite right, no matter how much I practised in the summer or early fall. However, I followed this post, and my turkey came out beautiful. The instructions were so clear and simple, and now all I have to do is make turkey soup with the bones!
Yessss, Jenn!! Good for you! I’m so happy the instructions made you feel comfortable and your turkey came out beautiful 🙂 Check out my turkey stock recipe if you need a recipe to use up the bones!! Beijos xx
This was SO helpful. My oven is a little quirky and this is the only way I’ve been able to do a turkey and actually have it come out well.
Due to a tick-borne food allergy to mammalian meat (beef, pork, etc) we eat a LOT of poultry at our house. That usually means chicken, because, you’re right, a whole turkey can be super intimidating. This step-by-step guide to spatchcocking was super helpful, and I feel more confident about incorporating more turkey into our menu plan.